
|
C-7 Home Page
Distribution
Accessories and Options
|
|

|
Baader Planetarium Methane (889nm) Narrow Bandpass Filter
Optical filters take away but they can not add anything to an image that is not there. By diminishing portions of the spectrum that we do not wish to see filters can make what we intend to study appears more prominently. So filters can render obvious that which is otherwise invisible.
The infrared channel of the filter passes the reflected light from an object of study at a wavelength where methane strongly absorbs (at 889nm) that light. Where clouds containing methane are present, they scatter the sunlight back away from the planet. Thus, when imaging Jupiter for example then the equatorial belts may in visible light appear white due to high alt ammonia clouds, but when imaged in the methane (CH4) band it will be dark due to methane that is being also there. So the features appear more contrasting and easier to capture changing events.
Right: Baader 1.25 inch diameter Methane Filter as provided since 2010 in heavy duty case (107,470 bytes). The methane 889nm near infrared filter came to prominence among the amateur astronomy community as this was among those filters incorporated into the NASA Voyager spacecraft, in the NASA Hubble Space Telescope Wide-Field Planetary Camera (WFPC2), in the Space Telescope Imaging Spectrograph (STIS), and in the Cassini CIRS. These instruments have produced amazing details of the cloud structures on Jupiter and details of its Red Spot (see below), Saturn and it's largest moon Titan, and Neptune. Closer to home and more recently, scientists have become alarmed at the increase of 'greenhouse gasses' in the Earth's atmosphere of which methane is among the prominent concerns. So this means space-borne platforms orbiting Earth, including NASA's Giovanni, incorporate one or more methane filters among their other filters to study atmospheric methane too. Images taken at this wavelength are usually in black and white since there is no color in the traditional sense at 889nm. However, the details imaged at 889 may be given combined with other images taken at other wavelengths to form a false color image. One famous example of this that was widely circulated is the NASA image below:
The Great Red Spot appears pink and the surrounding region blue because of the particular color coding used in this representation. The red color channel shows the reflectance of Jupiter at a wavelength where methane strongly absorbs (889nm). Because of this absorption, only high clouds can reflect sunlight in this wavelength. The green channel in the image represents the reflectance at 732nm wavelength where methane absorbs, but does so less strongly; lower clouds can reflect sunlight in this wavelength. Finally, the blue channel shows the reflectance at the 757nm wavelength where there are essentially no absorbers in the Jovian atmosphere and one sees light reflected from the deepest clouds. Thus, the color of a cloud in this image indicates its height, with red or white being highest and blue or black being lowest. Thus, the color of a cloud in this image indicates its height. Blue or black areas are deep clouds, pink areas are high and thin hazes, white areas are the high thick clouds. This image shows the Great Red Spot to be relatively high, as are some smaller clouds to the northeast and northwest that are surprisingly like towering thunderstorms found on earth. The deepest clouds are in the collar surrounding the Great Red Spot, and also just to the northwest of the high (bright) cloud in the northwest corner of the image. Preliminary modeling shows these cloud heights to vary over about 30km in altitude. Launched in October 1989, Galileo entered orbit around Jupiter on 7 December 1995. The spacecraft's mission is to conduct detailed studies of the giant planet, its largest moons and the Jovian magnetic environment. The Jet Propulsion Laboratory, Pasadena, CA managed the mission for NASA's Office of Space Science, Washington, DC. Being a NASA (taxpayer funded) image, this image is in the public domain.
This highly specialized filter is designed for use by a a suitable camera and lens or telescope that is provided with an imaging or other sensor systems that are optimized for technical and natural studies in this infrared portion of the spectrum. It also may find some uses in laser applications. The human eye is not sensitive to light beyond about 700nm hence no person can see what is transmitted by this filter, so this filter is not suitable for visual applications. The Baader Methane filter has such a narrow bandpass (8nm) that the images will be comparatively dim to a sensor than most other imaging filters typically used. Therefore, you are likely to require longer exposures of Jupiter and Saturn in particular with this filter than with other filters in your color filter wheel. The methane band could conceivably be helpful when imaging Uranus on long, guided exposured. While the Baader Methane filter may be best known for its usefulness for imaging Jupiter and Saturn, this filter is also useful for solar studies too as demonstrated by Piotr Maliński of Poland. Piotr maintains an image gallery with much helpful advice at www.rkblog.rk.edu.pl/astro/my_astro_images/jowisz/ Piotr advised Company Seven about imaging with the Baader methane filter:
Jupiter: it's probably the easiest target for this filter. DSI III Pro (ICX285) 16 bit at f/10 requires about 1 sec exposures (can be even pushed to 10 sec without saturation, but seeing will blurr the details). 100 frames will be ok. DMK21 (ICX098) 8 but at f/10Ê requires also aboyt 1 sec exposures, but due to high noise and low signal to noise ratio - you need IMHO about 1000 frames which would be insane - 16 min of imaging. Smaller ammount of frames gives very noisy image. Here is f/10 DSI III Pro bin 2, 1 sec taken 10 Jul 2010: and bin1 taken 10 Jul 2010: and bin1 at 150% size (drizzle stacking) taken 10 Jul 2010: Bigger it gets the more noise show up due to low S/N ratio, but still very good and detailed (all storms visible and some cloud structure). Methane filter will show all moons clearly, on the planets GRS storms will be white, and most of the planet dark due to methane. Impact marks caused by objects that got depper into Jupiter atmosphere tend to leave white spots of material from inner atmospehere that lacks methane. Recently some amateurs made a methane image with EMCCD (very very low noise) camera using one meter telescope at Pic Du Midie. The image taken by J-Luc Dauvergn is at www.nauka.rk.edu.pl/site_media/resources/nauka.rk.edu.pl/images/jupimethane2.jpg. As for false color images - you can combine 2 or 3 bands into a false color image. You can find UV-G-CH4 images of Jupiter or Saturn. Such combination adds more colors at the poles and can reveal more details in the atmosphere. CH4-RGB where methane band is luminescence also can be made. Combinations are endless but the goal is to get as much details defined by colors as possible. I've made some UV,CH4,RG1000 false color images (where RG1000 pass IR from 1000 nm) taken 24 Sep 2010: or color from two bands Ir8-CH4,CH4,Ir8 (Ir8 - pro planet 804, CH4 - baader methane) taken 21 Aug 2010: color from noisy CH4 image was transfered to low noise broad infrared image used as luminescence. Using XXY combination makes X dark places apppear blue, and Y yellow. Using WinJUPOS for RGB/LRGB images alows also to equal planet rotation and get a better false color image (and ch4 imaging takes a lot of time).
~~~~~~~~~~~~ Solar Continuum 540nm images (click to see enlarged view): 
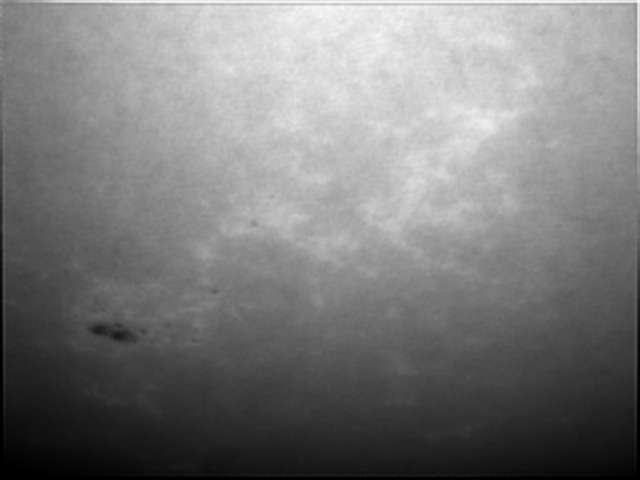
Methane 889nm images (click to see enlarged view): 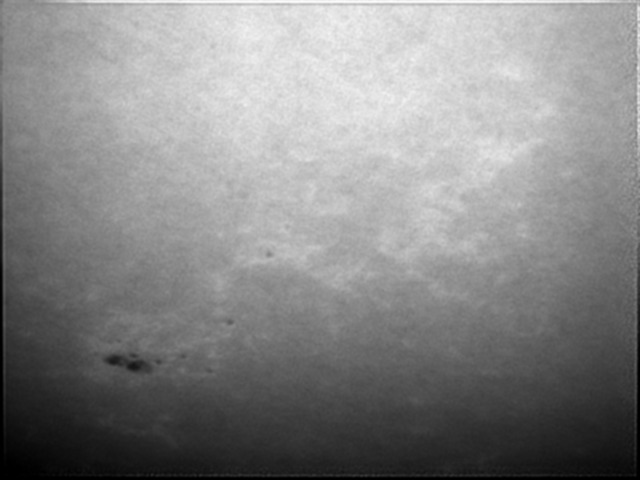

Combined images: 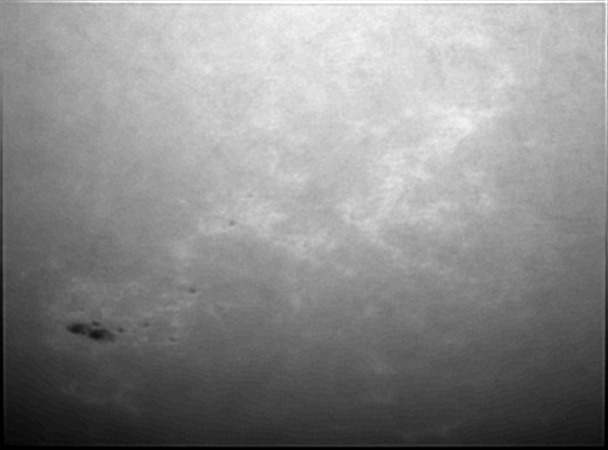
Incidentally, for those of you who wonder if Piotr took these from some immense observatory telescope these images were taken by him with an early 1970's vintage Celestron C-8, a 20cm inch aperture Schmidt-Cassegrain telescope using a Meade DSI III Pro CCD camera from his home deck in an urban location.
sunspots has contrast very low (granulation is almost invisible). I can even see some structure in umbra." WARNING when attempting to image the Sun with these filters note this is not for visual applications. Furthermore, an energy rejection 'pre filter' should be employed to cut the amount of heat that will otherwise accumulate in the telescope. If an energy rejection filter is not used in conjunction with the Methane Filter then the heat can be sufficient to damage the telescope, the Methane Filter, and the imaging system.
by diminishing portions of the spectrum what we intend to study appears more prominently filters can render obvious that which is otherwise invisible."
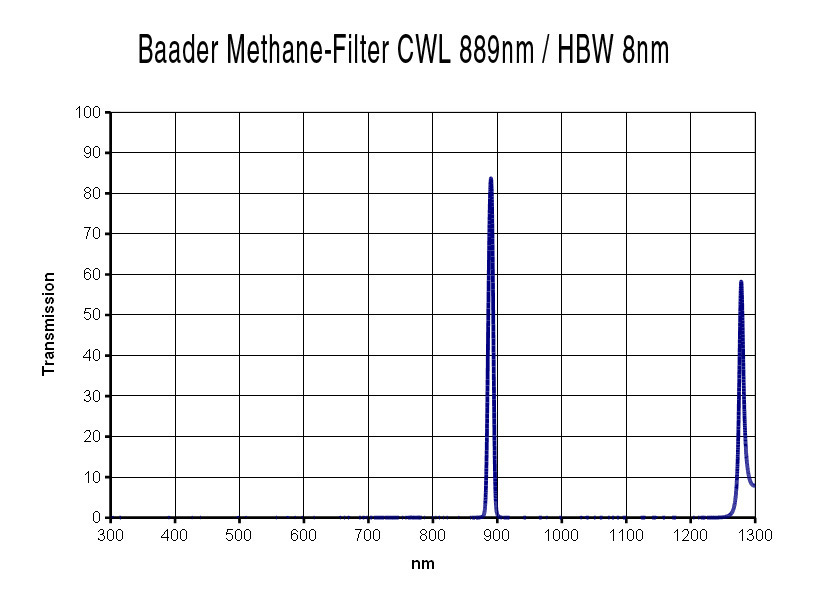
Right: Baader Methane Filter transmission curves (41,379 bytes). The Baader Methane Filter has proved to be useful to amateur and professional astronomers when taking images from Earth of the large gasseous planets and for our Sun. Astronomers involved with imaging from Earth find one of the advantages when working in the red (visible light) up into to the longer wavelengths, including the near-infrared, is that their equipment is less affected by any instability of the atmosphere and so the images taken in these wavelengths can show finer details and more contrast. However, to produce good results generally requires relatively longer exposure times.
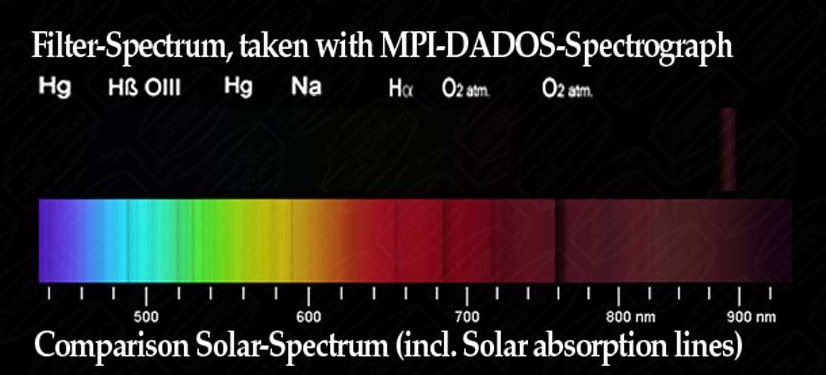
Above: Solar spectrum from ~425nm to 925nm illustrating the bandpass of the Baader Methane Filter as a narrow deep red line above the graph centered at 899nm (107,470 bytes).
In order to achieve the desired bandpass of only a very narrow 8nm bandwidth the filter is made from a disc of high grade Schott RG 830 optical filter glass that has been precisely ground to be plane parallel and then polished until very smooth. This glass undergoes a vacuum deposition coating process with many microns-thin dielectric coating layers of various elements are applied one upon another in a precise order and thicknesses forming a super stack. The coatings are calculated so that the filter ultimately transmits the desired wavelengths while simultaneously rejecting all other wavelengths above or below 889 nm ±3 nm. The coated glass filter element is housed in a machined aluminum cell, the filter is held there by a machined thread-on retaining ring. The filter name, size, and part number are in silver however this mirror like print when combined with its small size make this information difficult to read under dim red lighting. Company Seven recommends our customers keep these filters in well organized accessory case so that you know which filter is which. It helps to become familiar with how the elements appear too (read descriptions below). The coatings that are required to attain such a narrow bandpass are difficult and costly to produce, such that for the meantime these filters can only be made consistently in the smaller standard filter size of 1.25 inch (31.7mm) diameter. This size filter housing will thread into most 1.25 inch female fittings and this is suitable for use in many commercial filter wheels however, this filter will not be compatible with larger format CCD systems with detectors whose diagonal dimension exceeds the clear aperture of the filter. While this 1.25 inch (31.7mm) diameter may be inconvenient for our customers who own larger format CCD Color Filter Wheels, there is no great practical disadvantage to imaging the planets through the 1.25 inch (31.7mm) diameter filters because these objects are small enough to be covered by this format, even when employed on the larger Earth-based telescopes. However, the field of view when imaging the Sun may not be as wide as a larger format CCD system could otherwise provide. So one could dedicate one CCD system for imaging these smaller objects, and keep the larger CCD system equipped for imaging the larger, extended deep sky objects. When viewed parallel to the eye from the female threaded (or field) side, then the filter element appears like a silvered mirror. When looking from the male threaded (instrument) end then the filter element appears like a dim deep red colored mirror. Please contact us for advice that may be more specific to your requirements.
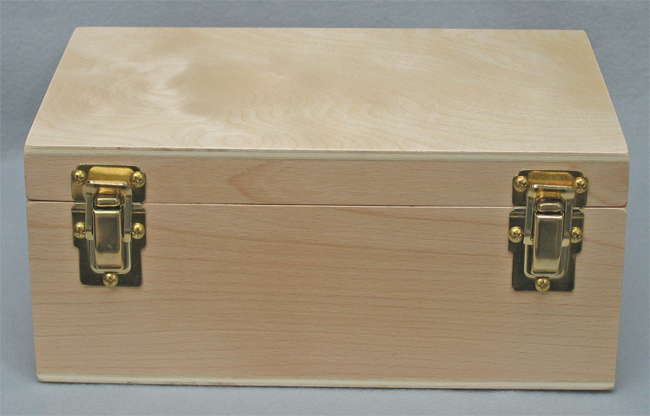
The optional wood case is foam lined with cutaway spaces for filters, eyepieces and other small accessories for your telescope. Please refer to our price list for current prices for the filter set and the optional case or contact Company Seven for more information.
Right: optional wood box for Color Filter Set (52,803 bytes)
FURTHER READING
|
|
|
Contents Copyright 1994-2010 Company Seven with images contributed by Piotr Malińskil; All Rights Reserved |
)